I set up a video camera on a tripod and programmed the camera to take .5 seconds of footage every 5 minutes, while I worked. Nine hours of weaving was condensed down to 40 seconds of time-lapse video. The weaving process itself generally takes me about 8-10 hours, but when including every step of cutting, gluing, etc my weavings take about 40 hours total. To see the entire process, from start to finish, check out Photographic Weaving: The Process.
In this piece, titled "Distribution Structure", I wove together aerial photography of the freeway interchange in Emeryville/Oakland, CA with images of circuit boards. This weaving explores ideas of the macro & micro. From an airplane, a city looks much like a circuit board, and circuit boards look like miniature cities unto themselves. However, not only do these two things appear similar, they also function in a very similar way. The way that cars move across freeways is not so different from how information moves through circuit boards, the internet, and technology in general. Freeways have made travel over long distances incredibly easy, creating a link between distant cities that connects friends, family and commerce, in much of the same way that the internet has connected people all over the globe.
Wednesday, January 12, 2011
Wednesday, January 5, 2011
Genesis of the Freeway Weavings Concept
I created my very first photographic weaving in high school. The weaving combines imagery of both my Jeep Cherokee engine and my backyard garden, exploring how nature inspires the technological designs around us. The left side of the weaving is predominantly garden imagery with just a few squares of engine woven in here and there. In the middle, the engine and garden begin to interweave together with birds of paradise blossoming into engine tubes. The right hand side of the weaving is almost entirely engine imagery with just a few squares of pink flowers peeking through. I created the weaving during a high school mentorship, with Santa Barbara artist Rafael Perea de la Cabada, which culminated in a show at the Santa Barbara Contemporary Arts Forum. My good friend Sarah Patterson is now the owner of this piece which asserts itself in quite a lengthy manner on her living room wall.
Ever since that project, I had wanted to return to weaving but wasn't sure what kind of imagery to use and, to be perfectly honest, I was a bit intimidated to try the difficult task of weaving again. One day, nine years later, feeling frustrated by a bad case of artist's block, I took some old pictures and decided to make a weaving out of them, just to get my weaving juices flowing again. They were pictures I had taken in college of food coloring in milk. I made two collages of the same size, cut one collage vertically and the other one horizontally, and wove them together. It turned out great! My friend Emily Sheffield is now the proud owner of this weaving and it hangs, framed, in her law firm office.
So here I was, nine years later, hooked on weaving again. I began brainstorming different concepts that I could weave together. I wanted to weave together the macro and the micro, two things that appear similar from both from far away and from close-up, but WHAT? One idea I had was how cities look like circuit boards from an airplane, and circuit boards look like miniature cities unto themselves.
My Google Earth search for interesting city imagery led me to a visual miracle: freeway overpasses! These concrete megaliths slither over the landscape like monumental snake pits. Strands of road soar through the air, interlacing like gigantic, hovering Celtic knots, so perfect and massive in form they seem to be woven by the hands of God himself. Each overpass is a unique work of art: some are circular, some are giant Xs, some are clover shaped, cross-shaped, and some are just a jumble of big loops. I then embarked on a compulsive hunt for the biggest, coolest overpass.
I had moved on, in my mind, away from circuit boards and toward my new obsession with overpasses. I decided to do a little test. I printed out two black & white images of different L.A. overpasses and wove the two together. The result, however, was neither conceptually nor visually interesting, so I spruced up the weaving with some acrylic paint, pink and green highlighter, and a sharpie pen. THe visual effect was exciting, however, I still felt as though something was missing conceptually.
Then it occurred to me that I could weave circuit board imagery into the city-scape AROUND the freeway overpasses! This way, the final image would appear from a distance like a simple freeway overpass surrounded by urban sprawl, but up close it would be hard to differentiate what was building and what was circuit board component.
The connection, conceptually, between freeway overpasses and circuit boards became stronger in my mind as I remembered that the "Information Super Highway" is a metaphor commonly used for the internet. Cars moving on freeways can be seen as a metaphor for how information moves through circuit boards, the internet, and technology in general. Freeway overpasses make travel over long distances easy, creating a connection between LA and San Francisco for friends, family and commerce, much in the same way that the internet has connected people all over the globe. Not only was this idea visually interesting, but it was conceptually interesting as well. I was pumped.
My first freeway/circuit board weaving (above) was a complete success and I received rave reviews from friends and family. I decided to create a series of these large weavings, my goal being about 8-10 weavings. My next subject was the CA-101 & I-92 junction in San Mateo, right before getting on the San Mateo Bridge.
The rest is history! Check out my other "Photographic Weavings" postings to see more current projects.
 |
| "The Garden". 2000. Photographic Weaving. CLICK TO ENLARGE. |
 |
| "The Garden". DETAIL. |
 |
| "The Garden". DETAIL. |
 |
| "The Garden". DETAIL. |
 |
| CLICK IMAGE TO ENLARGE. "Birth of Color". Photographic Weaving. 18" x 24". |
My Google Earth search for interesting city imagery led me to a visual miracle: freeway overpasses! These concrete megaliths slither over the landscape like monumental snake pits. Strands of road soar through the air, interlacing like gigantic, hovering Celtic knots, so perfect and massive in form they seem to be woven by the hands of God himself. Each overpass is a unique work of art: some are circular, some are giant Xs, some are clover shaped, cross-shaped, and some are just a jumble of big loops. I then embarked on a compulsive hunt for the biggest, coolest overpass.
I had moved on, in my mind, away from circuit boards and toward my new obsession with overpasses. I decided to do a little test. I printed out two black & white images of different L.A. overpasses and wove the two together. The result, however, was neither conceptually nor visually interesting, so I spruced up the weaving with some acrylic paint, pink and green highlighter, and a sharpie pen. THe visual effect was exciting, however, I still felt as though something was missing conceptually.
 |
| CLICK IMAGE TO ENLARGE. "Weaving Traffic", 2010. (Highway 5 & 2 interchange woven with Highway 105 & 405 interchange). Photographs, acrylic paint, highlighter, sharpie pen. 11" x 17". |
The connection, conceptually, between freeway overpasses and circuit boards became stronger in my mind as I remembered that the "Information Super Highway" is a metaphor commonly used for the internet. Cars moving on freeways can be seen as a metaphor for how information moves through circuit boards, the internet, and technology in general. Freeway overpasses make travel over long distances easy, creating a connection between LA and San Francisco for friends, family and commerce, much in the same way that the internet has connected people all over the globe. Not only was this idea visually interesting, but it was conceptually interesting as well. I was pumped.
 |
| CLICK IMAGE TO ENLARGE. "Untitled", 2010. Photographic Weaving. 20" x 48" (Images of circuit boards woven with bird's-eye view of CA-101, I-5, I-10, I-60 Junction in Los Angeles). |
 |
| CLICK IMAGE TO ENLARGE. "Untitled", 2010. Photographic Weaving. 24" x 40". (Images of circuit boards woven with CA-101 & I-92 junction in San Mateo) |
Wednesday, December 29, 2010
San Francisco Airport (IN SPACE!)
 |
| San Francisco Int'l Airport in Google Earth |
Whenever I drive to the San Francisco Airport, I am struck by the complex network of freeway overpasses which I must travel over and under to get from the 101 to the terminals. When picking up a friend, who hasn't yet arrived, I am forced to then loop back around and make my ascent back up through the Escher-esque maze of elevated streets. I look forward to these loops and try to slow down as much as possible to fully soak in the woven, concrete web surrounding me, much to the dismay of the hurried taxis in my rear view window.
I recalled this driving experience a couple weeks ago and eagerly searched for the overpass on Google Earth so I might judge its worth as a potential weaving. What I saw induced one helluva satisfied gasp. The freeway overpass was stunning from the air with its wriggling, gray tentacles arching this way and that in a strange sort of elegance. A concrete fountain, frozen mid-spray. An asphalt fern with twisted fronds. So much movement and life!
But would these organic, curving shapes look good once woven with the right angles and straight lines of a circuit board? I had my doubts.
The more I struggled with the circuit board compatibility issue, the more interested I became in the airport itself. The octagonal center has a spaceship quality and resembles the Star Wars Millennium Falcon or the Star Trek USS Enterprise.
 |
| SFO "spaceship" as seen in Google Earth |
Combining Ideas
In Photoshop, I experimented with how the airport might look woven with a circuit board, but the result was too busy and very aesthetically jarring. Plus, the circuit board imagery seems to work best with the blocky grid of suburban/urban sprawl, and there was just blank wide open runway surrounding the airport. I then thought, "What about putting this 'spaceship' in SPACE!" Of course! I had been so preoccupied by circuit boards that this idea was a major breakthrough.
 |
| Photoshop Test. Image Credit: NASA and U.S. Geological Survey. |
 |
| Detail of Photoshop Test |
Back From the Printer with my 30" x 50" Prints
This is the first time I have had large prints made for my weavings. Previously, I was getting 8 x 10's printed at Walgreens, puzzling them together, and gluing them. It saved me a little bit of money, but I started to realize that it wasn't worth the headache or my time. Plus, I felt like working with two large prints would give my work a more professional look.
 |
| 30" x 50" print of the San Francisco International Airport. Image courtesy of the U.S. Geological Survey. |
 |
| 30" x 50" print of the universe, before it gets cut into 133 half inch strips. Image courtesy of NASA. |
 |
| After measuring the prints, on the back side, into 3/4 inch strips, I begin cutting with scissors. |
Weaving
After two arduous 2-3 hour weaving sessions, I am halfway done.

Three hours later, I'm finished weaving!
 |
| The finished weaving. All that's left to do is to glue down the strips (another 5 hour or so project). |
This is an important step of the process because without gluing it all down, the strips are loose and can shift around becoming dislodged and out of order. Using a small brush, I lift up each strip and dab some glue beneath it to secure it. The gluing process took about 8 hours.

Filming a Time-Lapse of the Weaving Process
I programmed the camera to take .5 seconds of video every 5 minutes. As I work, I hear little dings as the camera records snippets of me weaving. These cheery chirps provide me with a strange sense of companionship as I toil away, and they also give me a comforting reassurance that there is a witness to this crazy process and that it will be recorded.
 |
| My time-lapse video set-up. |
Time-Lapse Video: "Future Of Flight"
Images of the Final Weaving
 |
| "Future of Flight", 2011. 30" x 50". Photographic Weaving. CLICK TO ENLARGE. |
 |
| "Future of Flight". DETAIL. |
 |
| "Future of Flight". DETAIL. |
 |
| "Future of Flight". DETAIL. |
Saturday, December 25, 2010
Come with Me
I wrote this poem after seeing an African drumming and dance performance my freshman year at UC Berkeley. The women were dressed in bright red dresses, leaping around, and stomping on the stage to the driving beat of drums whose rhythm pulsed right through the air and into my veins. There was so much life being lived on that stage, I wanted to go home and spread the gospel of really LIVING.
Come with Me
Mr. Business Man
Under that suit is a body made from earth–
a product
of ten million years
of tweaking by a Darwin
tuning fork
But down your chest hangs a
Fancy Silver Tie
severing that God-sculpted masterpiece
right in two
like dynamite set by train track men
to blow a mountain straight in
half
Fancy Silver Tie
hanging like a hangman's rope
ready to strangle your soul
and let it sway in the wind bug-eyed
So why aren't you crying then
poor Mr. Business man?
Don't you feel hurt
all sliced down the middle
like that?
You keep on typing
and that phone still sucks on your ear so hungry
like a piglet from its mother's
teet
Come with me
Take off that tie
so your torso can fuse its fibers back
Unstitch your spine from the
scarecrow pole
Throw that posture to the wind!
It's okay to flop down all messy-like
down in a heap of straw
Breathe in sky as the drum beat pounds in your thundering thighs,
it's called music and it'll do you good
Now shake that belly like it's
strawberry jelly
Spread your sweetness on the
toasty ground
Do it just like I saw those
Mozambique girls do, all covered in red
and jumpin' through the air like
rose petals in
wind
When I rub this warm, orange mud
on your scrubbed and disinfected flesh,
you'll remember that you are Man
and I am Woman
and this land was made for dancing
My smile will arch up like the hull of a sailboat
I will have done what I aimed to do:
helped you find your Life that
got lost along the way
laying wasted and strewn on
the rotting corpse of
civilization
for all these
years
 |
| Joyful Dancer, 2010. Acrylic on canvas. 24" x 30". Sold. |
Old Poem, New Painting
I was looking through a binder of my old college poetry the other day and was struck by the similarity in imagery between one of my poems and my drawing, "Bottom of the Sea." It's been 9 years since I wrote that poem, and I definitely wasn't thinking about it when I drew this drawing, which makes me wonder if this imagery speaks to an aspect of my subconscious.
Here is the poem.
Goodbye
A boat passes by
Ah, your hand on my waist!
An animal cries somewhere in the
salty air
It is a Moment!
But it vanishes quick like warm breath in the Arctic
I think it slipped through the cracks in the wood
You are thinking of her, aren't you?
Hush.
Don't hush me you know it is true
My heart and I can leave you
two alone
We can jump off this pier
and sink slow like
pebbles dropped
Don't worry about us
we will be just fine
My heart and I can find some quiet cave
to hide with the sea urchins and spiny things
Eventually, the oxygen will disappear
along with my strangled, unbeating heart
leaving you
up above
with her
Crouched like a crab and
peering up
Your embrace wears the obscuring veil of
watery miles
Your love looks like waking from a sleep–
diaphanous forms, enmeshed in rippled sparkle,
arm fusing into forehead like
honey poured in milk
That's your love:
Luminous, foggy, blurry, bright
the way the world looks through a post-dream
watery eyeball
That's your love and that's your dream
but merely bubbles from my silent scream
I was born to make this sacrifice
I was born to die this way
with amoebas and microbes
at the bottom of the sea
She was born to have the moon
Quiet!
I will sink slowly soon
Here is the poem.
 |
| Bottom of the Sea, 2009. Pastel on Paper. 21" x 28" |
A boat passes by
Ah, your hand on my waist!
An animal cries somewhere in the
salty air
It is a Moment!
But it vanishes quick like warm breath in the Arctic
I think it slipped through the cracks in the wood
You are thinking of her, aren't you?
Hush.
Don't hush me you know it is true
My heart and I can leave you
two alone
We can jump off this pier
and sink slow like
pebbles dropped
Don't worry about us
we will be just fine
My heart and I can find some quiet cave
to hide with the sea urchins and spiny things
Eventually, the oxygen will disappear
along with my strangled, unbeating heart
leaving you
up above
with her
Crouched like a crab and
peering up
Your embrace wears the obscuring veil of
watery miles
Your love looks like waking from a sleep–
diaphanous forms, enmeshed in rippled sparkle,
arm fusing into forehead like
honey poured in milk
That's your love:
Luminous, foggy, blurry, bright
the way the world looks through a post-dream
watery eyeball
That's your love and that's your dream
but merely bubbles from my silent scream
I was born to make this sacrifice
I was born to die this way
with amoebas and microbes
at the bottom of the sea
She was born to have the moon
Quiet!
I will sink slowly soon
Tuesday, December 21, 2010
Photographic Weaving: The Process
Many people are quite confused when I explain the process for my photographic weavings. The explanation that I give is, in a nutshell, taking two large photographs of the same size, cutting them into vertical & horizontal strips, and weaving them together. Simple enough, right?
However, the conversation typically goes something like this:
Them: " So you weave the freeway photos with actual circuit boards?"
Me: " No. With pictures of circuit boards. They're just two pictures woven together"
Them: " Do you make a painting of the freeway overpass and weave that?"
Me: " No. It's a picture. Aerial photography"
Them: " Are your weavings three dimensional?"
Me: " No. THEY'RE TWO PICTURES WOVEN TOGETHER!"
Them: " Huh. I still don't get it"
Me: " (sigh) I'll email you a picture"
Maybe it's my lack of clear verbal skills, or maybe it's the dizzying mental barage of freeways, circuit boards, weavings (oh my!) that gets people in a head scratching frenzy. Understandable. My conclusion is that it simply needs to be seen to be understood, so I've decided to chronicle my process, start to finish, below.

The aerial photography files are very large and are, therefore, usually sent in sections. The interchange was downloaded in 4 sections which I then had to puzzle together in Photoshop so it would appear as one seamless image.

In Photoshop I fuse together the four images, determine the size, composition, and do some minor color correction. Since it's too expensive for me to get large prints made, I have found a cheaper alternative: I divide the image into a grid of 8" x 10" sections, get the 8" x 10" sections printed, and then puzzle them together to form one big picture. The poor man's print.
This initial stage of working out the images is the hardest part for me because it takes a lot of brain power, computer power, and decision making. From here on out it's all about patience and becoming one with the mind numbing and back breaking monotony (ahem...I mean the process).
Back at home with my prints and now it's time to glue. I brush acid free glue on the back of each photo and use a roller to fasten them securely to the paper (which is acid free as well, archival all the way baby).


And voila! My two images! They look so peaceful before they're all sliced up and forced into their over-under mating dance of woven chaos.


Now it's time to flip these bad boys over and start measuring the strips. I measure the freeway overpass into horizontal strips and the circuit board into vertical strips.

One hundred and twelve strips to cut for the circuit board image. My hands are hurting just looking at it. I number the strips for the vertically cut image (the circuit board one) because the strips are free floating and if I don't number them I can easily get the order messed up. The horizontally cut image (the freeway one) is held together by a strip of paper that I leave uncut so no need to number the strips on that one.

I take frequent breaks during the cutting process or else my hands light up in an electrical storm of carpal tunnel nerve twinges. People ask me why I use scissors instead of box cutters or an Exacto knife. I feel like I have more control with scissors.

The beast waits to be tamed, her tentacles lay washed up on my kitchen floor until I awake rested in the morning. Tomorrow we weave! A productive day, I'd say.
I spent a good 3+ hours cutting the circuit board image into strips. I was now officially ready to begin weaving. After two hours of weaving I had woven 20 strips. Only 92 more to go!

These two hour sessions are typically followed by a series of neck, back, knee, and ankle stretches. Weaving is very hard on my body, I had trouble sleeping last night because my back hurt so much. If my weavings were a tad smaller I could fit them onto my drafting table which would be much more comfortable.
Today, I spent another 7 hours weaving, and finally, I was finished. But I still wasn't FINISHED finished. After the weaving is done, I need to glue down all of the strips so that none of them slide around and fall out of place. However, I've done enough work today, the gluing will have to wait until tomorrow.
However, the conversation typically goes something like this:
Them: " So you weave the freeway photos with actual circuit boards?"
Me: " No. With pictures of circuit boards. They're just two pictures woven together"
Them: " Do you make a painting of the freeway overpass and weave that?"
Me: " No. It's a picture. Aerial photography"
Them: " Are your weavings three dimensional?"
Me: " No. THEY'RE TWO PICTURES WOVEN TOGETHER!"
Them: " Huh. I still don't get it"
Me: " (sigh) I'll email you a picture"
Maybe it's my lack of clear verbal skills, or maybe it's the dizzying mental barage of freeways, circuit boards, weavings (oh my!) that gets people in a head scratching frenzy. Understandable. My conclusion is that it simply needs to be seen to be understood, so I've decided to chronicle my process, start to finish, below.
DAY 1
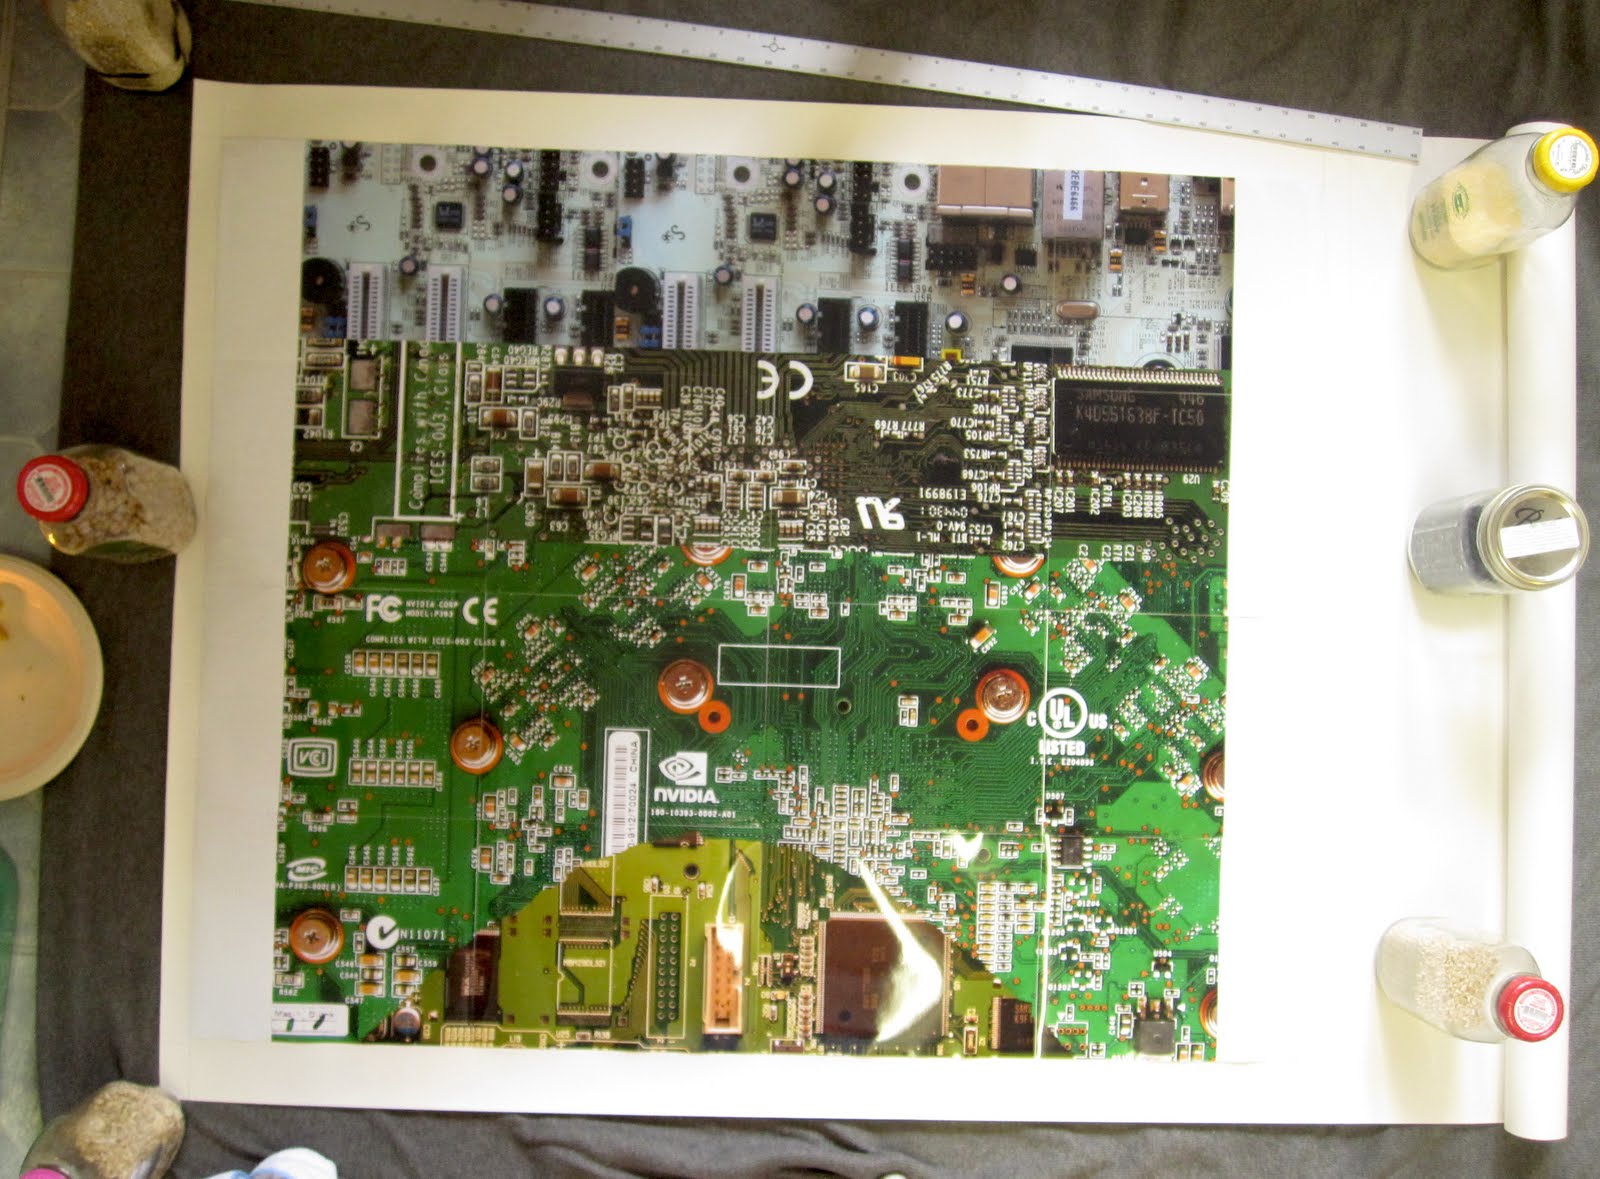
After pinpointing my next freeway victim on Google Earth, I go to the U.S. Geological Survey website to download the aerial photography. These images are in the public domain, paid for by our tax dollars. Thank you government. This image is of the "Distribution Structure" in Oakland/Emeryville, CA, just before getting on the San Francisco Bay Bridge from the East Bay.
The aerial photography files are very large and are, therefore, usually sent in sections. The interchange was downloaded in 4 sections which I then had to puzzle together in Photoshop so it would appear as one seamless image.

In Photoshop I fuse together the four images, determine the size, composition, and do some minor color correction. Since it's too expensive for me to get large prints made, I have found a cheaper alternative: I divide the image into a grid of 8" x 10" sections, get the 8" x 10" sections printed, and then puzzle them together to form one big picture. The poor man's print.
This initial stage of working out the images is the hardest part for me because it takes a lot of brain power, computer power, and decision making. From here on out it's all about patience and becoming one with the mind numbing and back breaking monotony (ahem...I mean the process).
Day 2
Back at home with my prints and now it's time to glue. I brush acid free glue on the back of each photo and use a roller to fasten them securely to the paper (which is acid free as well, archival all the way baby).


And voila! My two images! They look so peaceful before they're all sliced up and forced into their over-under mating dance of woven chaos.

Now it's time to flip these bad boys over and start measuring the strips. I measure the freeway overpass into horizontal strips and the circuit board into vertical strips.

One hundred and twelve strips to cut for the circuit board image. My hands are hurting just looking at it. I number the strips for the vertically cut image (the circuit board one) because the strips are free floating and if I don't number them I can easily get the order messed up. The horizontally cut image (the freeway one) is held together by a strip of paper that I leave uncut so no need to number the strips on that one.

I take frequent breaks during the cutting process or else my hands light up in an electrical storm of carpal tunnel nerve twinges. People ask me why I use scissors instead of box cutters or an Exacto knife. I feel like I have more control with scissors.

The beast waits to be tamed, her tentacles lay washed up on my kitchen floor until I awake rested in the morning. Tomorrow we weave! A productive day, I'd say.
Day 3
I spent a good 3+ hours cutting the circuit board image into strips. I was now officially ready to begin weaving. After two hours of weaving I had woven 20 strips. Only 92 more to go!
 |
| Weaving the circuit board image into the aerial photography image. This is after 2 hours of weaving. |

These two hour sessions are typically followed by a series of neck, back, knee, and ankle stretches. Weaving is very hard on my body, I had trouble sleeping last night because my back hurt so much. If my weavings were a tad smaller I could fit them onto my drafting table which would be much more comfortable.
Day 5
Today, I spent another 7 hours weaving, and finally, I was finished. But I still wasn't FINISHED finished. After the weaving is done, I need to glue down all of the strips so that none of them slide around and fall out of place. However, I've done enough work today, the gluing will have to wait until tomorrow.
Day 6
After 5 hours of gluing, the weaving is now very secure and flat, almost like a mat. I can pick up the weaving and transport it without worrying about it falling apart.
FINISHED AT LAST!
 |
| "Distribution Structure", 2011. Photographic Weaving. 31" x 33". CLICK IMAGE TO ENLARGE. |
 |
| CLICK IMAGE TO ENLARGE. |
 |
| The big building with the yellow trim is the Ikea in Emeryville. CLICK IMAGE TO ENLARGE. |
 |
| CLICK IMAGE TO ENLARGE |
 |
| CLICK IMAGE TO ENLARGE |
 |
| CLICK IMAGE TO ENLARGE |
Time-Lapse Video
I set up a video camera on a tripod while I worked and programmed the camera to take .5 seconds of video at 5 minute intervals. In this time-lapse video, 9 hours of weaving are condensed down to 40 seconds.
Subscribe to:
Posts (Atom)