However, the conversation typically goes something like this:
Them: " So you weave the freeway photos with actual circuit boards?"
Me: " No. With pictures of circuit boards. They're just two pictures woven together"
Them: " Do you make a painting of the freeway overpass and weave that?"
Me: " No. It's a picture. Aerial photography"
Them: " Are your weavings three dimensional?"
Me: " No. THEY'RE TWO PICTURES WOVEN TOGETHER!"
Them: " Huh. I still don't get it"
Me: " (sigh) I'll email you a picture"
Maybe it's my lack of clear verbal skills, or maybe it's the dizzying mental barage of freeways, circuit boards, weavings (oh my!) that gets people in a head scratching frenzy. Understandable. My conclusion is that it simply needs to be seen to be understood, so I've decided to chronicle my process, start to finish, below.
DAY 1
After pinpointing my next freeway victim on Google Earth, I go to the U.S. Geological Survey website to download the aerial photography. These images are in the public domain, paid for by our tax dollars. Thank you government. This image is of the "Distribution Structure" in Oakland/Emeryville, CA, just before getting on the San Francisco Bay Bridge from the East Bay.
The aerial photography files are very large and are, therefore, usually sent in sections. The interchange was downloaded in 4 sections which I then had to puzzle together in Photoshop so it would appear as one seamless image.

In Photoshop I fuse together the four images, determine the size, composition, and do some minor color correction. Since it's too expensive for me to get large prints made, I have found a cheaper alternative: I divide the image into a grid of 8" x 10" sections, get the 8" x 10" sections printed, and then puzzle them together to form one big picture. The poor man's print.
This initial stage of working out the images is the hardest part for me because it takes a lot of brain power, computer power, and decision making. From here on out it's all about patience and becoming one with the mind numbing and back breaking monotony (ahem...I mean the process).
Day 2
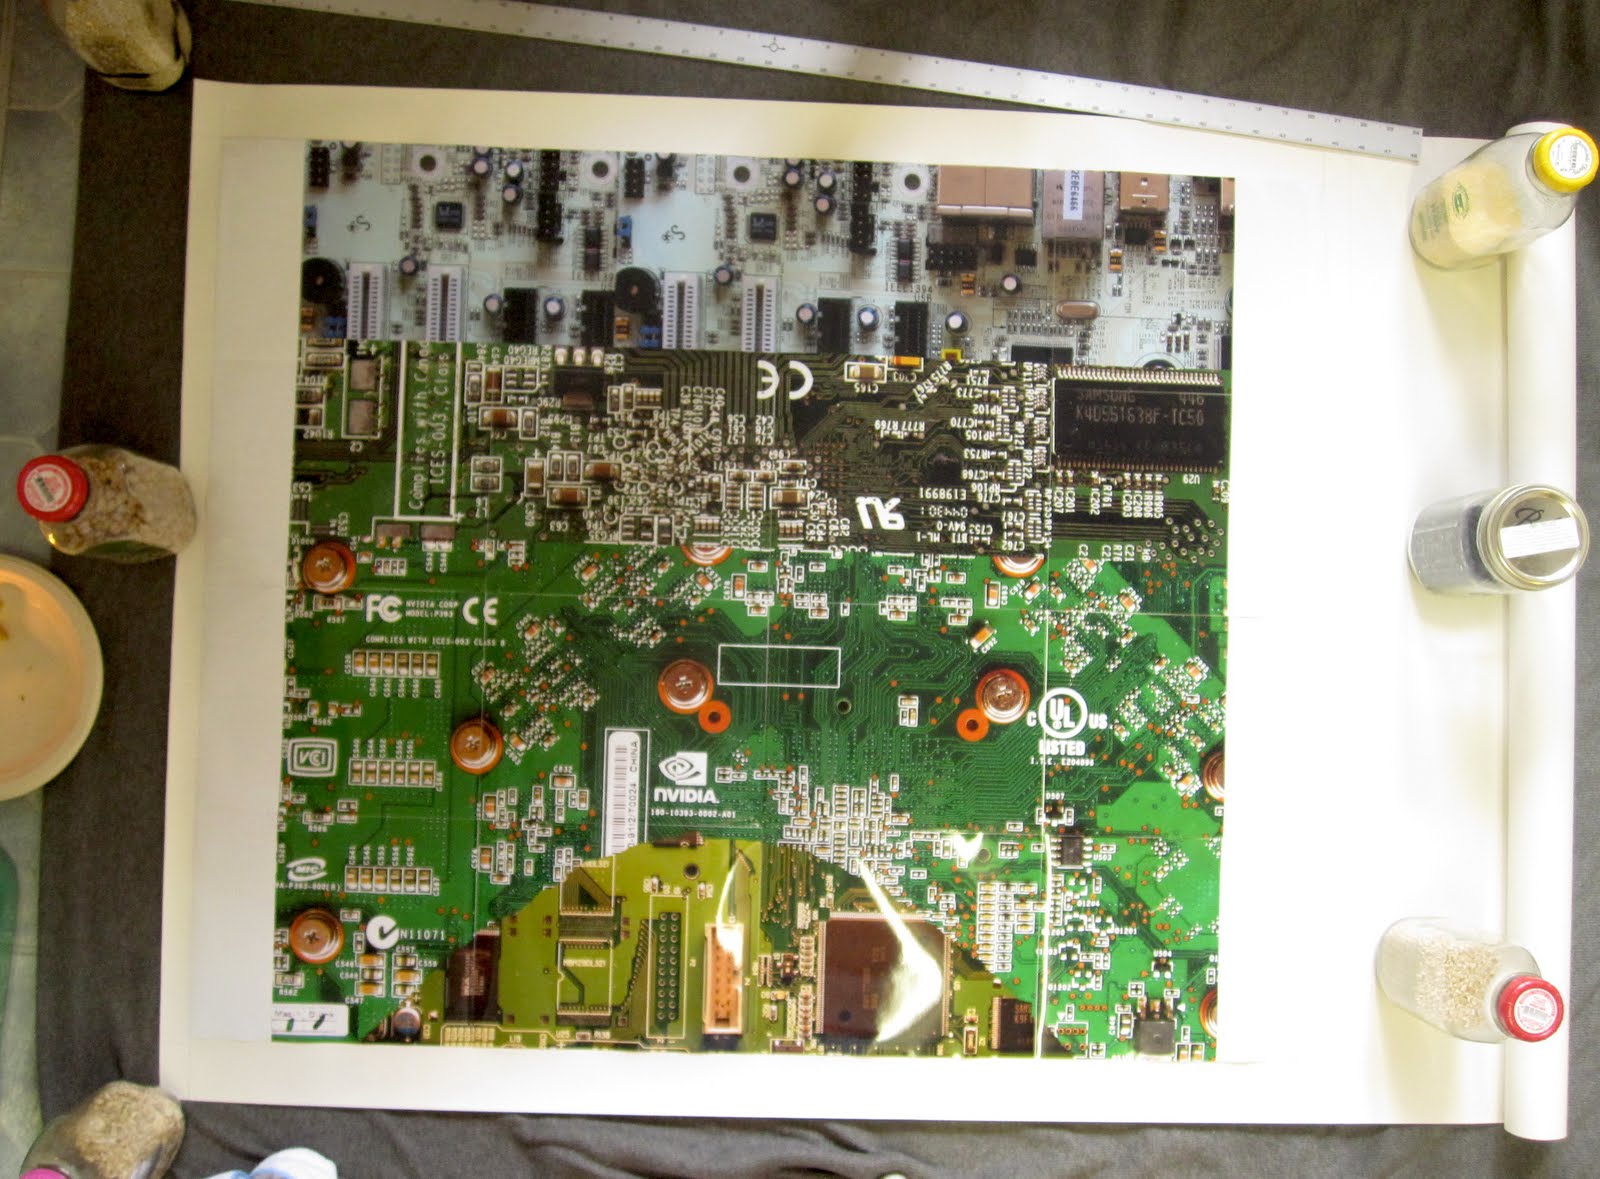
Back at home with my prints and now it's time to glue. I brush acid free glue on the back of each photo and use a roller to fasten them securely to the paper (which is acid free as well, archival all the way baby).


And voila! My two images! They look so peaceful before they're all sliced up and forced into their over-under mating dance of woven chaos.

Now it's time to flip these bad boys over and start measuring the strips. I measure the freeway overpass into horizontal strips and the circuit board into vertical strips.

One hundred and twelve strips to cut for the circuit board image. My hands are hurting just looking at it. I number the strips for the vertically cut image (the circuit board one) because the strips are free floating and if I don't number them I can easily get the order messed up. The horizontally cut image (the freeway one) is held together by a strip of paper that I leave uncut so no need to number the strips on that one.

I take frequent breaks during the cutting process or else my hands light up in an electrical storm of carpal tunnel nerve twinges. People ask me why I use scissors instead of box cutters or an Exacto knife. I feel like I have more control with scissors.

The beast waits to be tamed, her tentacles lay washed up on my kitchen floor until I awake rested in the morning. Tomorrow we weave! A productive day, I'd say.
Day 3
I spent a good 3+ hours cutting the circuit board image into strips. I was now officially ready to begin weaving. After two hours of weaving I had woven 20 strips. Only 92 more to go!
 |
| Weaving the circuit board image into the aerial photography image. This is after 2 hours of weaving. |

These two hour sessions are typically followed by a series of neck, back, knee, and ankle stretches. Weaving is very hard on my body, I had trouble sleeping last night because my back hurt so much. If my weavings were a tad smaller I could fit them onto my drafting table which would be much more comfortable.
Day 5
Today, I spent another 7 hours weaving, and finally, I was finished. But I still wasn't FINISHED finished. After the weaving is done, I need to glue down all of the strips so that none of them slide around and fall out of place. However, I've done enough work today, the gluing will have to wait until tomorrow.
Day 6
After 5 hours of gluing, the weaving is now very secure and flat, almost like a mat. I can pick up the weaving and transport it without worrying about it falling apart.
FINISHED AT LAST!
 |
| "Distribution Structure", 2011. Photographic Weaving. 31" x 33". CLICK IMAGE TO ENLARGE. |
 |
| CLICK IMAGE TO ENLARGE. |
 |
| The big building with the yellow trim is the Ikea in Emeryville. CLICK IMAGE TO ENLARGE. |
 |
| CLICK IMAGE TO ENLARGE |
 |
| CLICK IMAGE TO ENLARGE |
 |
| CLICK IMAGE TO ENLARGE |
Time-Lapse Video
I set up a video camera on a tripod while I worked and programmed the camera to take .5 seconds of video at 5 minute intervals. In this time-lapse video, 9 hours of weaving are condensed down to 40 seconds.
This is so fascinating!
ReplyDeleteGina, thanks for posting the first comment on my blog! Glad you find it fascinating, I do too :)
ReplyDeleteThanks for sharing this. Very cool. How about getting a bigger table or cutting the pictures so they fit on your table? Otherwise these weavings may end up as very limited editions.
ReplyDeleteMelissa, you're right that making my images smaller would make my life a whole lot easier ;) Unfortunately, I'm too tempted by the WOW effect of big weavings. A huge table would take up a big chunk of my small apartment, but maybe a table with leaves would be the perfect solution! I should start checking Craigslist...
ReplyDeleteAnd you even made a video! Nice soundtrack. ;)
ReplyDeleteThanks for checking out my blog Jason, people usually have a hard time understanding the process until they see all the different steps. Glad you like the Erasure song too :)
ReplyDeleteI'm doing a photo-weaving of my own for art class, and if you see this I'd love some help if you could give it for these two questions:
ReplyDelete1) What type of glue to you use at the end to glue the strips? (Any further elaboration on the gluing process would be much appreciated, since this is a problem I have run into during practice runs.)
2) How do you keep the strips from moving around while you weave?